Ready to get a firmer grip on drawing hands? In this edition, I am going to share my top tips for drawing this often-intimidating body-part. First, let’s address the main reasons (in my opinion) so many artists struggle with hands below.
Hands are really flexible and can adopt a wide variety of poses that present rapidly changing shapes in the many different angles you have to draw them from.
Hands can require you to manage some fine details to show fingers and other parts, compared to the overall body, alternatively you must find a way of showing their shape and pose in a highly condensed way.
We see hands all the time and recognize certain poses and shapes so if they look wrong it can really damage the effect of the drawing overall.
With practice observing and depicting the basic shapes and structures of the hand, drawing them will get less intimidating. Ultimately the goal is to gain the confidence to use hands more creatively in your figure artwork. Let’s see if we can get a handle on it!
Top Tips
1. Start with Basic ShapesStudy
When we approach drawing as translating the subject into shapes and forget that we are drawing ‘a hand’, getting the shapes and proportions right will get much easier. Look for the basic shapes found in the hand. Where are the joints? Where do the contours change? What are the overall structures that make up the hand and what are their visual relation to each other?
What’s the best way for you to break the hand down into basic solids in your drawing? Look for a way of constructing the hand from interlocking shapes that suits you.
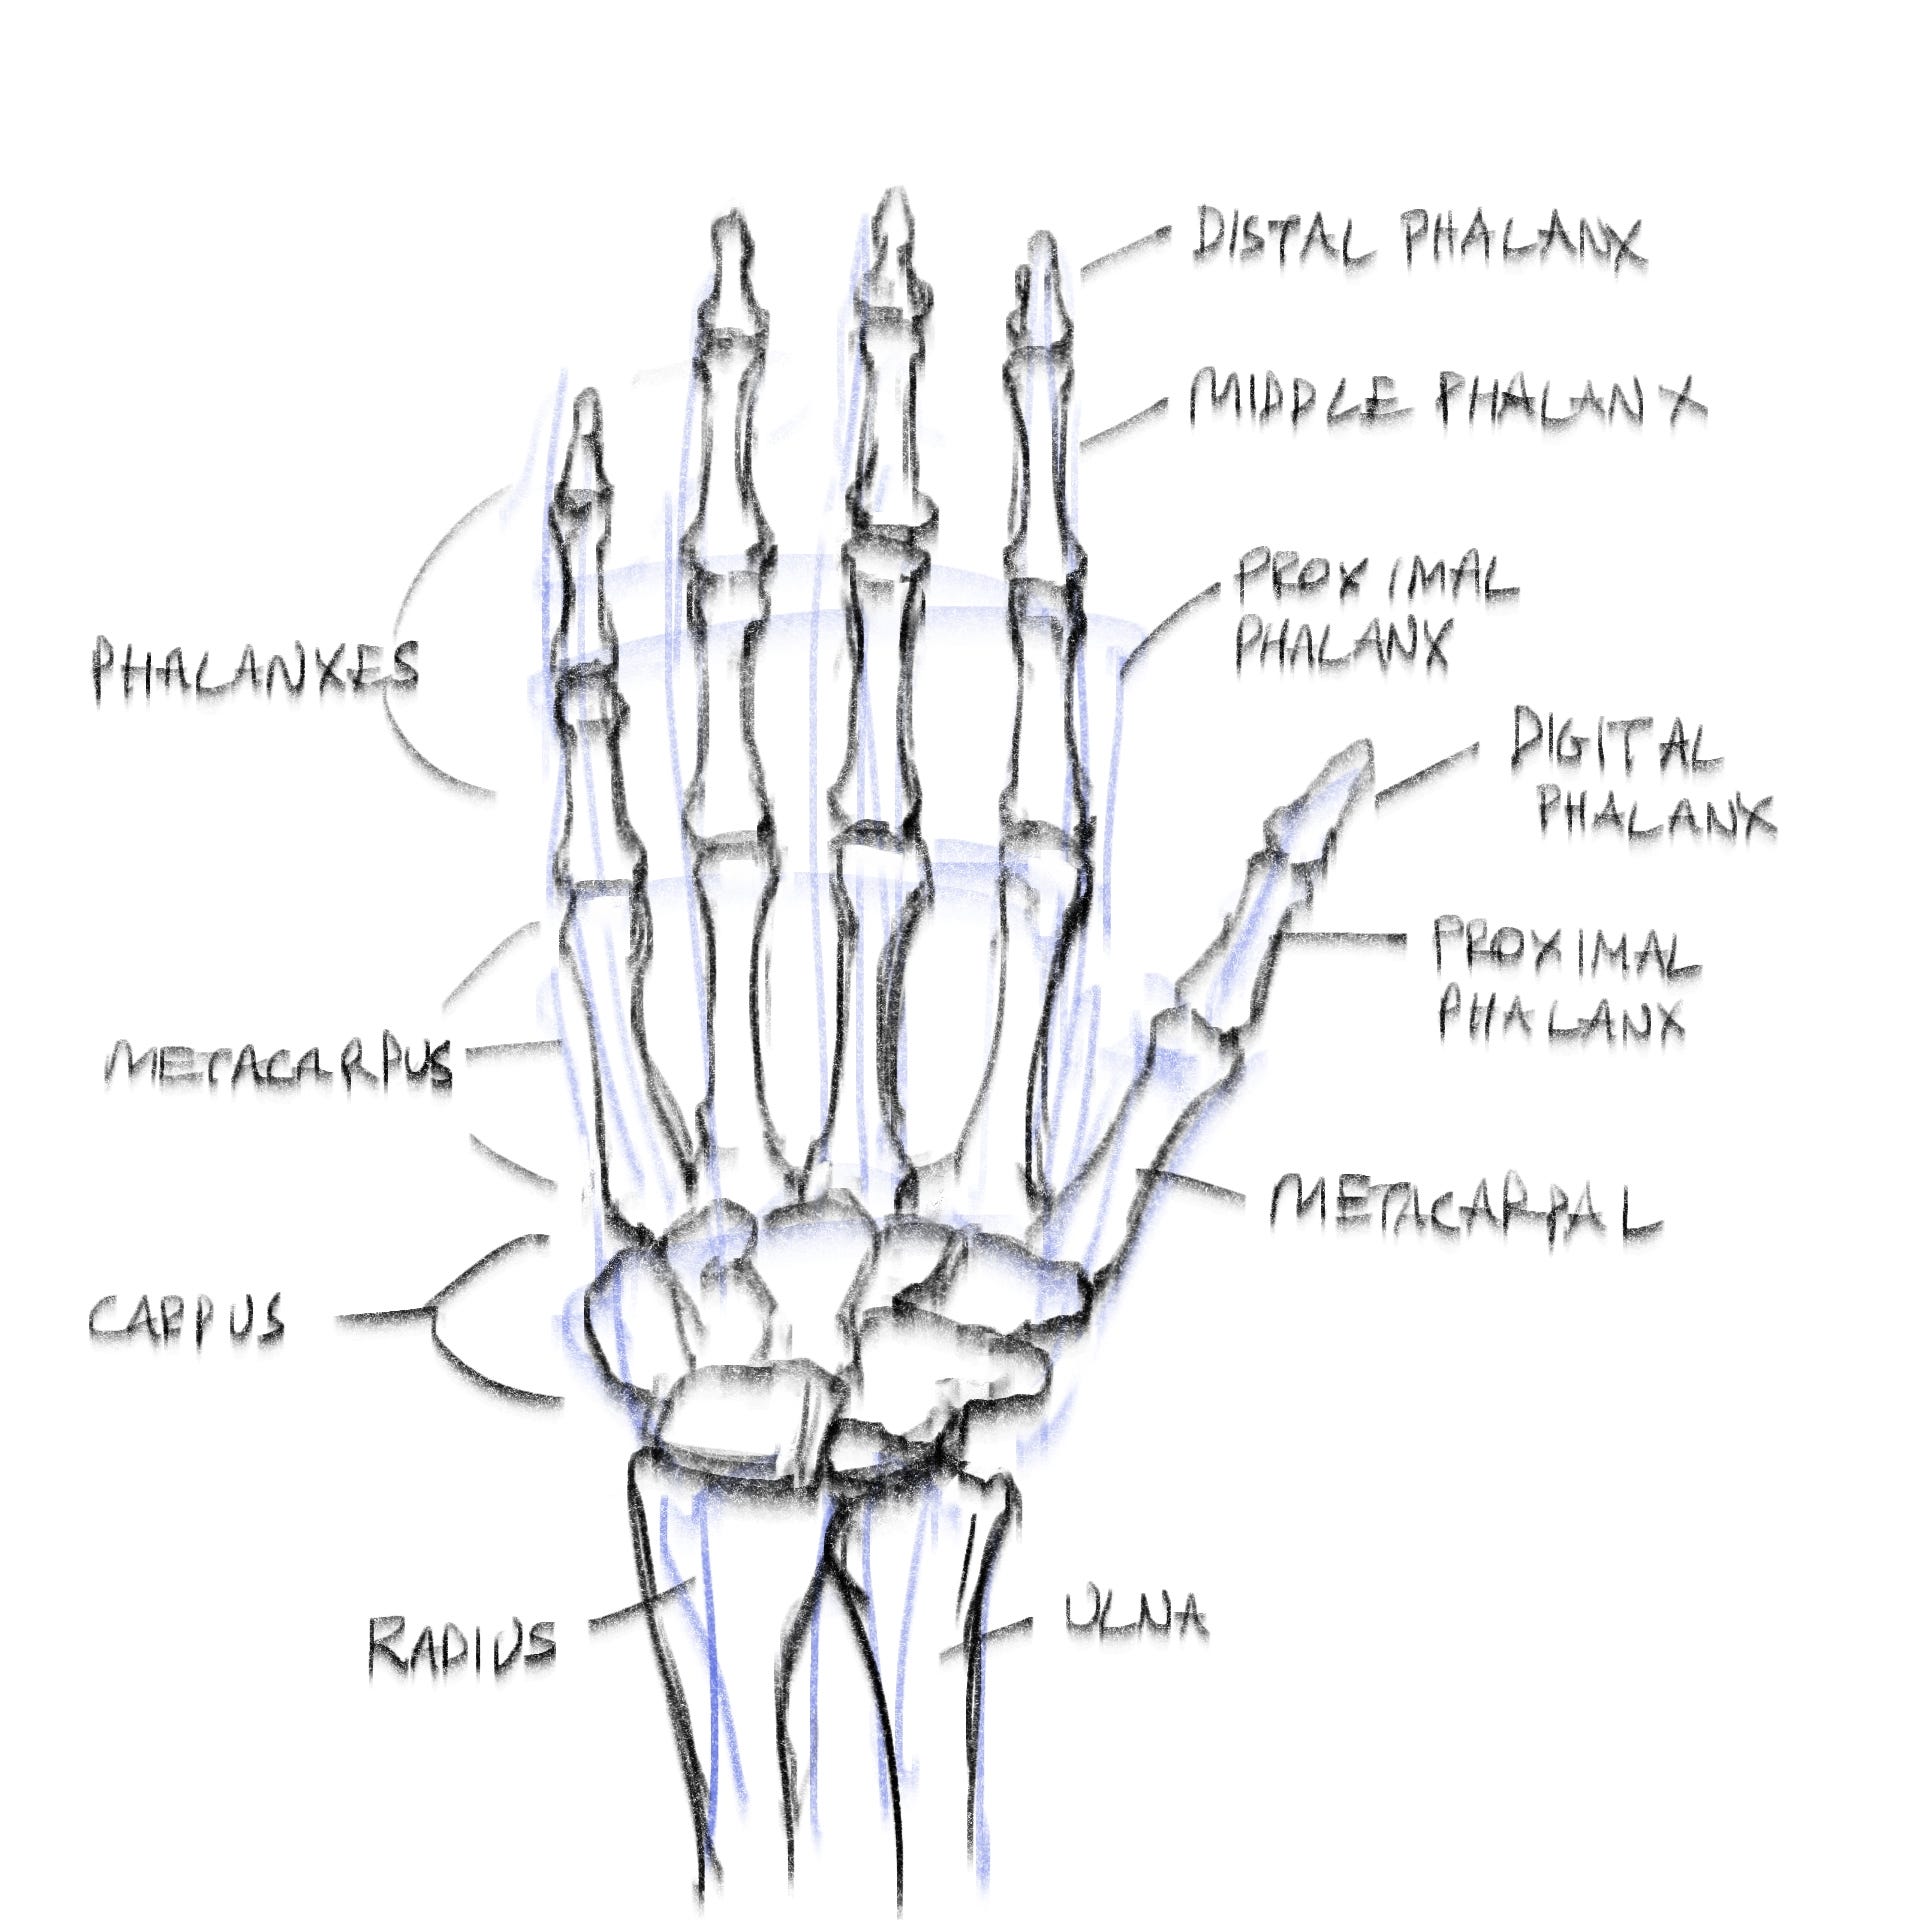
2. Understand the Anatomy
Learning the basic structure of the hand, including bones and muscles will help you to understand the often-subtle difference between a hand that looks good and one that doesn’t work.
Though a lot of art styles require only quite simplified or stylized versions of the body, with the hand being sometimes only a kind of mitten, taking the time to study the bones, muscles, tendons and how they operate can really inform this kind of work too. It doesn’t need to take a lot of your overall learning time, but I would recommend at least making a few drawn studies from anatomical images to deepen your understanding of the shapes you see and inform your thinking about the flexibility of the hands and what poses will be expressive and convincing.
3. Study the Proportions
Though they vary in size and overall shape and details from person to person, there are consistent inner proportions and structures that artists often have to condense into just a few lines.
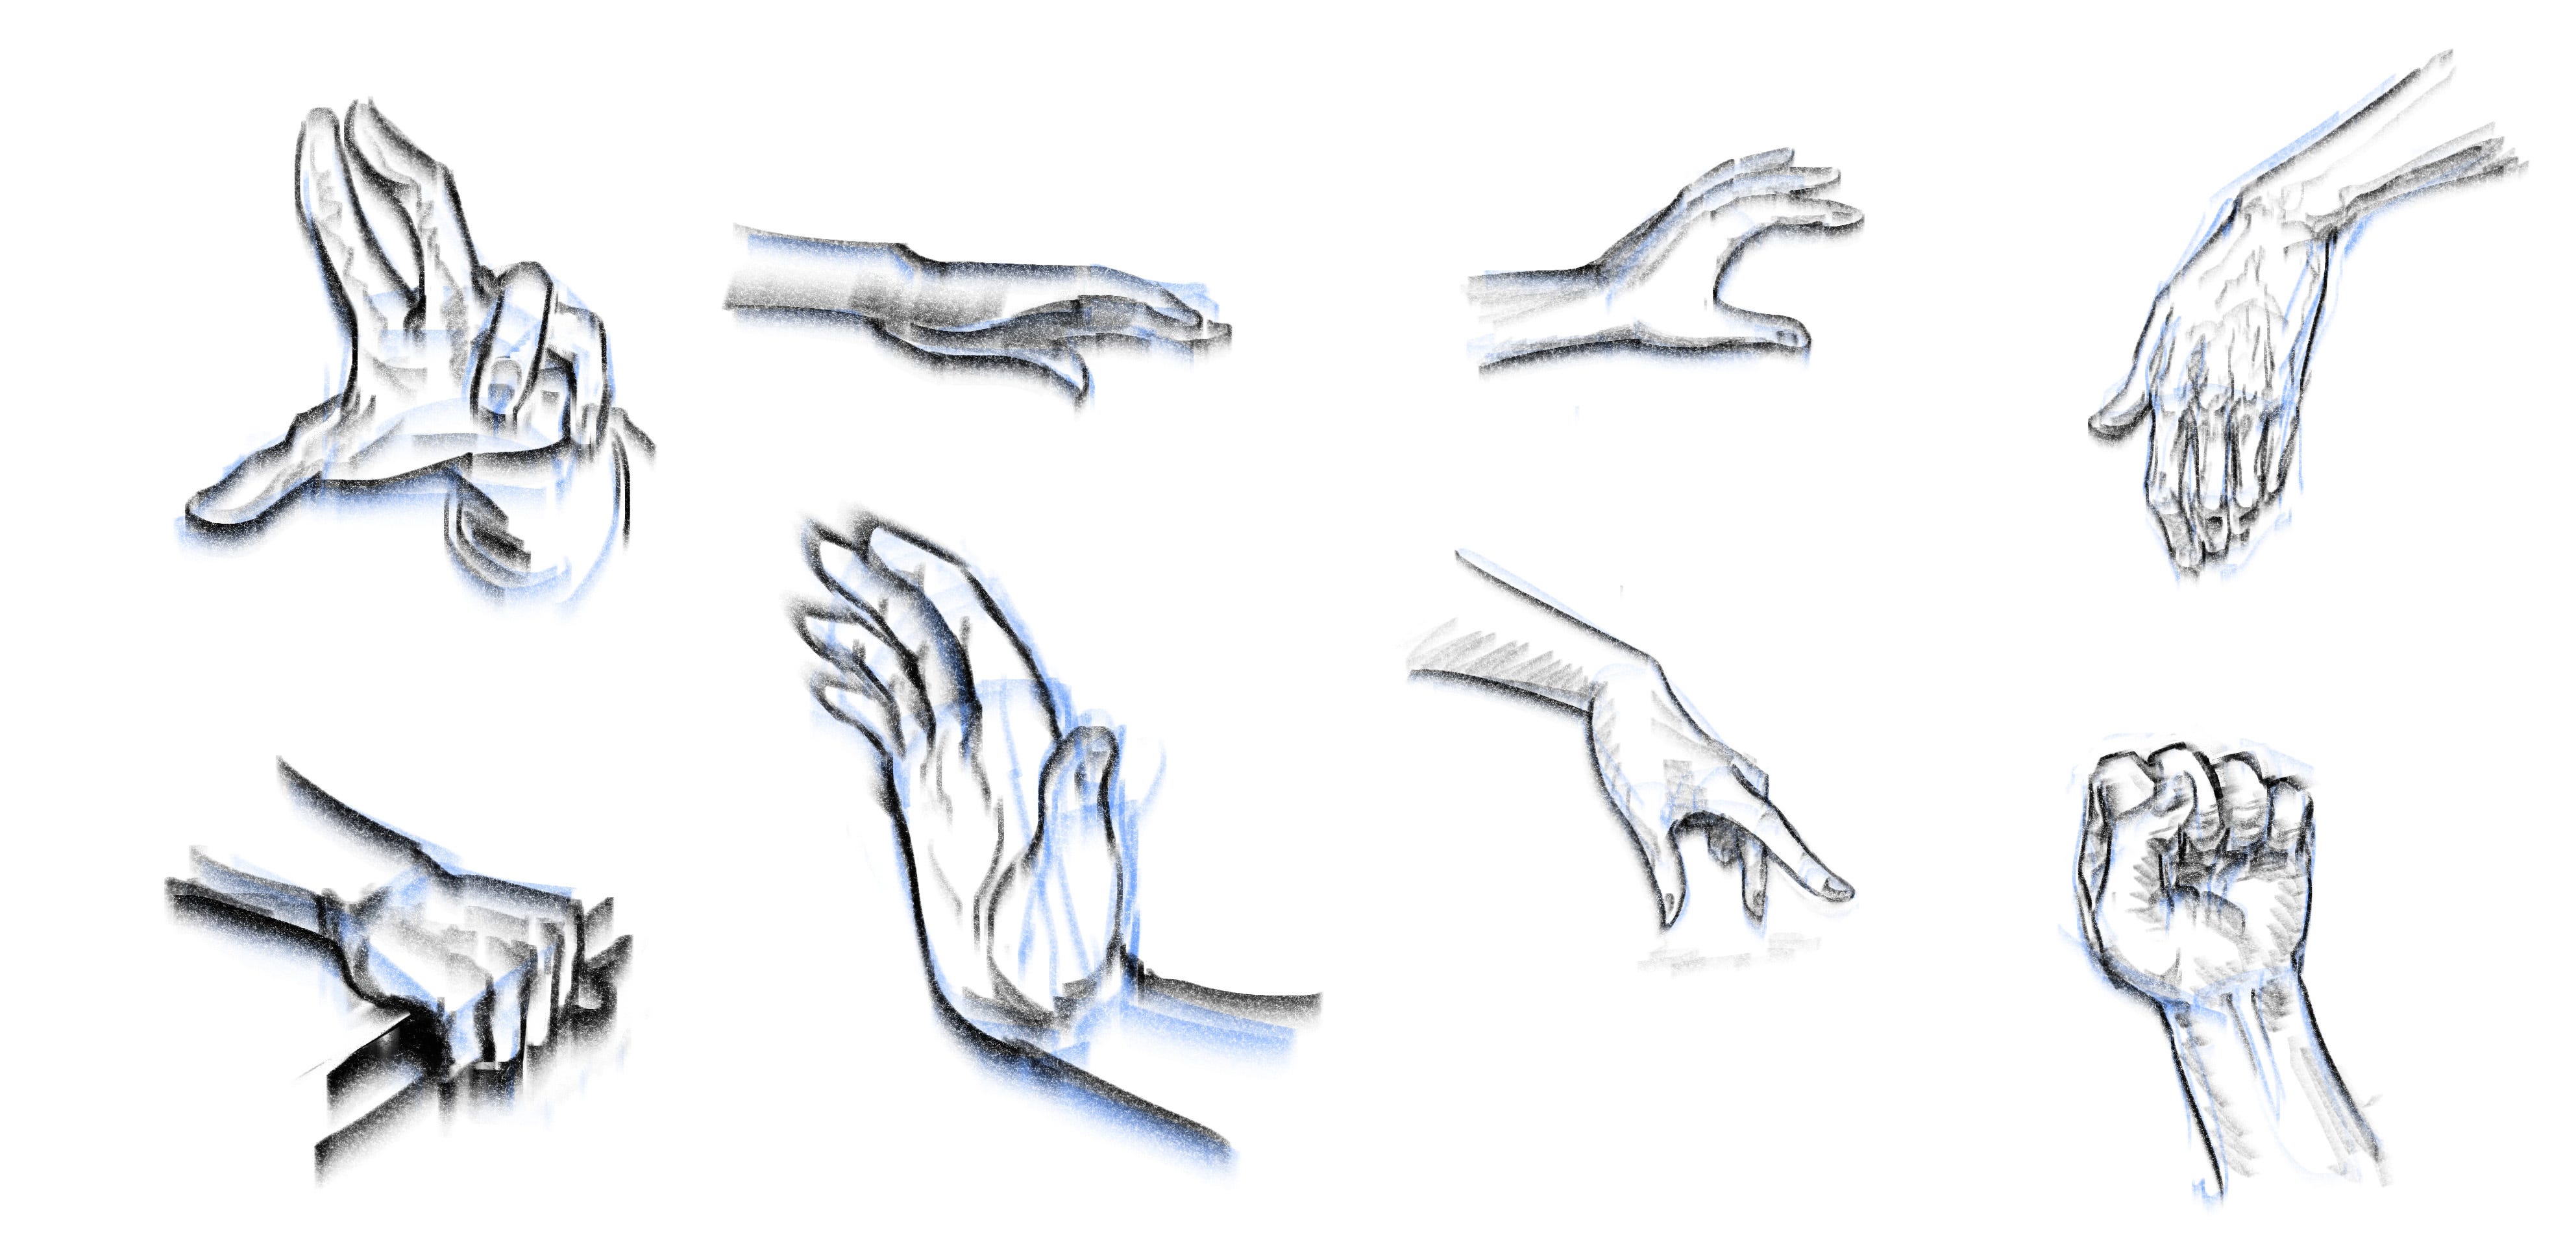
4. Practice Different Poses
When I started to take drawing figures seriously, trying as many different hand-poses as possible helped me to build a ‘library’ I could employ from memory in my illustrations. Sometimes, however this library needs refreshing, and I will still quite often draw hands from reference or use my hand and a mirror or my phone to figure something out. In general, the more challenging the poses you draw, the better you will get at drawing the hand with confidence whether from life/reference or from your head. CAN WE HAVE THE VIDEO OF THIS ONE HERE? (HandConstructionSt3Exp1)
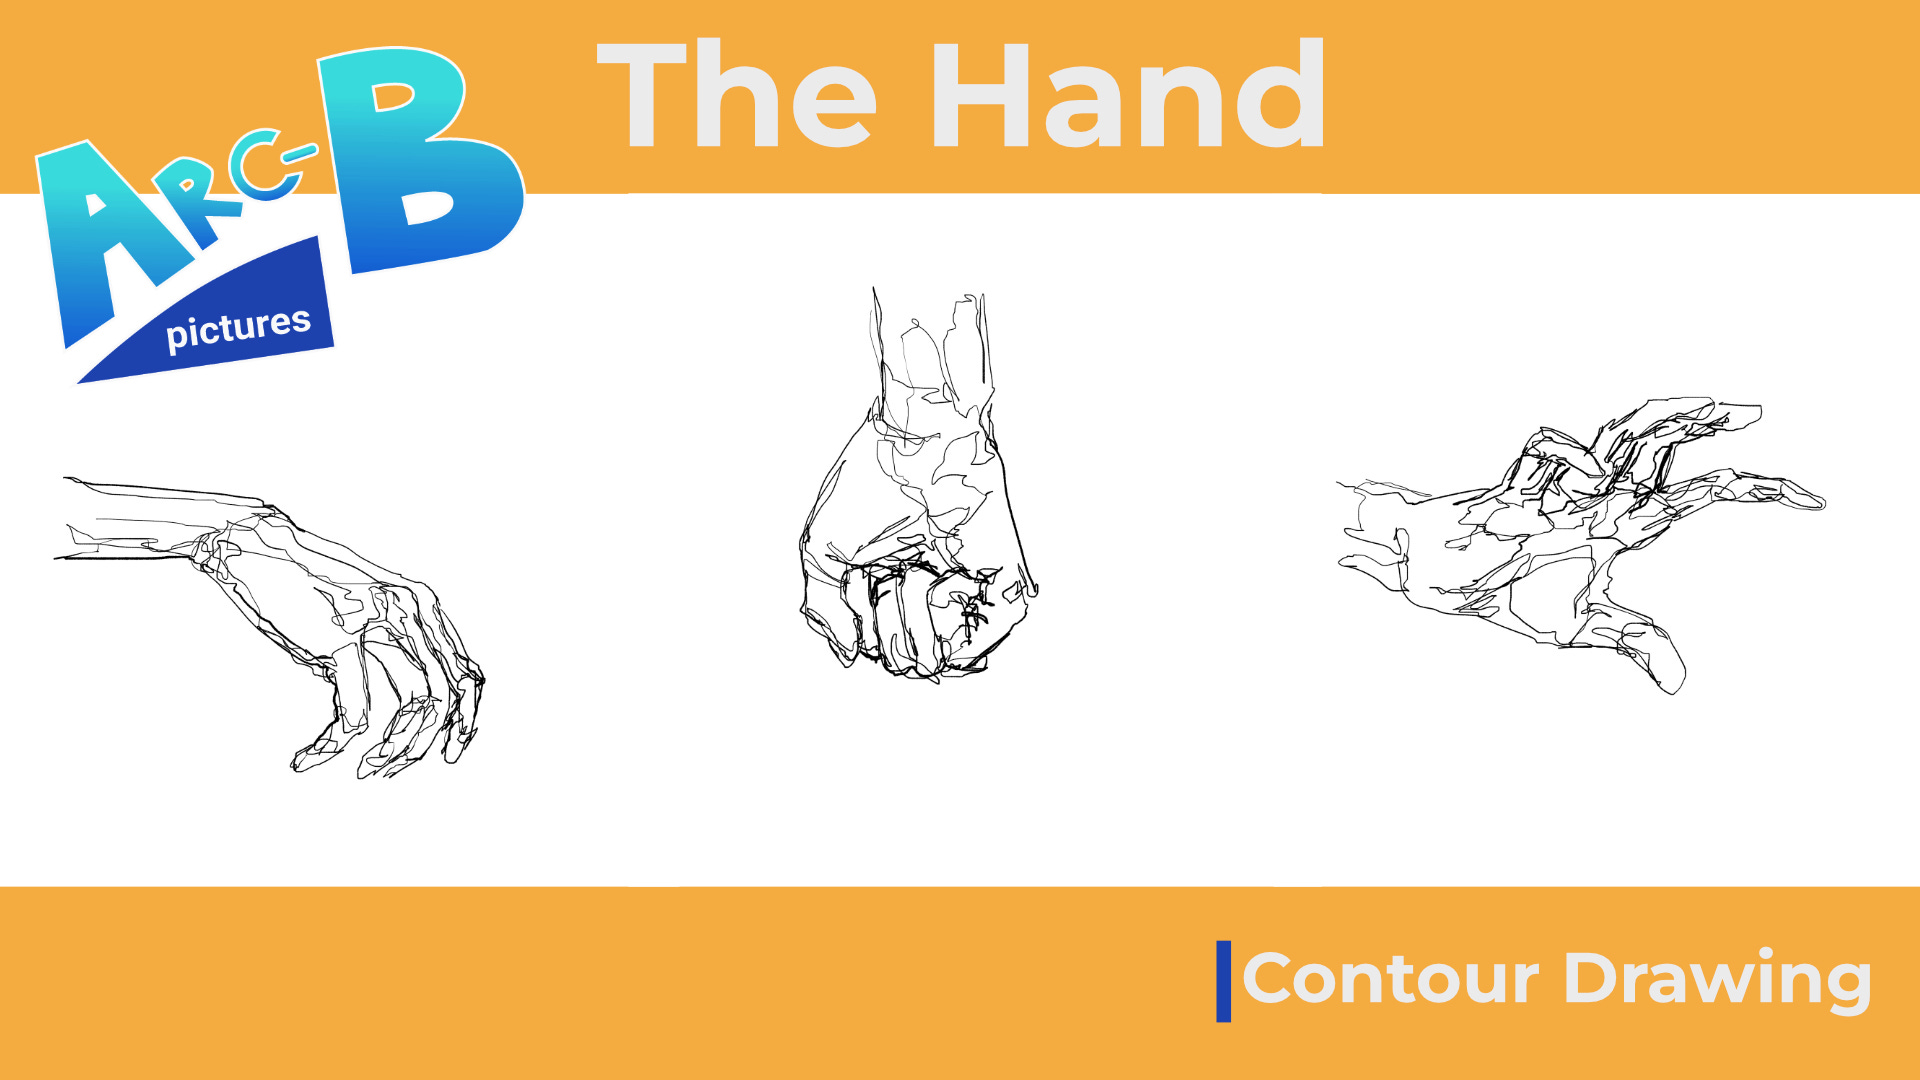
There are two ways of working that are both worth trying, in my experience most artists use some combination of these in their process:
Contour drawings where you put yourself under a bit of time pressure and try not to lift your pencil or pen, focusing on close study of the subject and replicating the shapes you see as instinctively and truthfully as you can. Sometimes we won’t even look at the drawing and just stare at the subject hand (this is called ‘blind’ contour). This kind of exercise is great for improving your ability to translate shapes from the subject fluidly on to paper and prevent you from inventing shapes too much.
Gesture sketching techniques using construction shapes for the parts of the hand to understand and depict 3 dimensional looking structures that you can then work over to get your final lines. In this approach you should also work as quickly as you can and stay alert to the relative scale, shape and angle of the parts of the hand. This approach works well for drawing the hand from your imagination/memory once you have developed that confidence.
5. Use Reference Images
Many artists will work from references in various ways, more or less closely. It’s really up to the individual but I would say that at least for learning its worth looking at reference or your own hand to get familiar with the shapes and forms of the hand. Once you have built up a bit of a library of hand-poses you will have the confidence and knowledge to draw from imagination and memory. Even then, I find, having access to reference or posing your own hand for particular poses or angles can help to clarify things in your drawing.
Common Problems
Hands can present challenges which I think we need to address head on. Here are some of the most common problems I have noticed artists struggling with when dealing with hands.
1. Hiding Hands or Keeping them Too Basic
In their anxiety about not getting them right I’ve had students who tried hiding the hands with sleeves or behind props as much as possible. Another common strategy is to stick to a particular hand pose that they have learned and use that everywhere. This can be quite limiting to the work overall. If you want to have a range of options in posing the hand in your artwork building your confidence in this area is important.
2. Thumbs, Knuckles and Finger arrangement and angles
It’s easy for artists to get confused by the way thumbs and fingers can adopt quite different angles from each other and seem to bend or twist in certain poses, like when making a fist. Worth noting that the knuckles can vary in position a lot and that, though arranged in a semi-circle roughly, they can present at quite different angles. Study the way fingers splay when opening and which of them tend to be straightest, don’t assume that they are evenly bent or angled. Look for the negative spaces and draw the nearest ones first. Use construction marks to indicate the positions of fingers and thumb before drawing them solidly.
Don’t forget the massive pad of tissue at the base of the thumb and how mobile it can be, despite looking so much shorter than the fingers.
Let’s Dive into Drawing
1. Hand-Posing Sheet (12-20 drawings)
If you have an instagram account Tag us on your hand drawings, we would love to see them!
Want a FREE hand reference practice sheet?
Simply Subscribe and email us the word ‘hand’:
Use any of the construction methods shown above (or your own version of hand-construction) to lightly define the hand-pose, then complete with darker line-art and a bit of tone. Please try to leave the construction visible in your final drawing or scan/photograph the drawings at the rough construction phase as well as when you are done.
2. The Anatomy
Start with studying the basic bone structure — do a plan view of a flat hand and then try some more difficult angles/poses.
The goal here is to develop your understand of how the skeleton works, move into understanding the relationship between the various tendons, cartilage, muscles and soft tissues and then how the skin stretches and folds with the various poses of the hand.
Visually Speaking
Here are some more hand sketches from Archie. Please feel free to make your own sheets and share them on instagram and tag @arcb.pictures
Happy Drawing! Remember, practice makes perfect. Share your progress with us using @arcb.pictures and stay tuned and subscribe if you have not already.
If you are ready to learn more, sign up to our full 8-week mentorship with Archie Birch. Level up your drawing now. Seats are limited and the mentorship works on a first come first serve basis.
Thanks for reading Arc-B Pictures! Subscribe for free to receive new posts and support my work.