Understanding Perspective
Exploring the Techniques and Principles That Bring Depth and Dimension to Art
Hello Artists!
Many student artists are intimidated by the principles of point perspective and/or how to use them in practice. Let’s dive in and pull perspective apart a little, getting you more comfortable to tackle drawing subjects that challenge you to show depth planes in your drawing.
There are a number of ways of creating the effect of perspective or depth apart from the use of Cartesian projection or ‘point perspective’. These include atmospheric perspective in landscape art or simply the overlapping of objects in depth – but point perspective is a particularly useful tool for visual artists and bears some explanation. I have often seen capable artists struggle to find a nice way to use it in practice and they can land up avoiding doing architecture and things like that because it's too frustrating to get it right.
Top Tip
Although we all have different processes, and some amazing artists do detailed grid projections for some subjects my top tip is not to spend too much time on rendering detailed grids everywhere. Rather see point perspective as a tool to help create a convincing illusion by aiding your understanding and perception of how these planes can be represented on the page to create the illusion of depth and for double-checking the perspective planes and angles you should have in your drawing.
1. Grasp the Basics
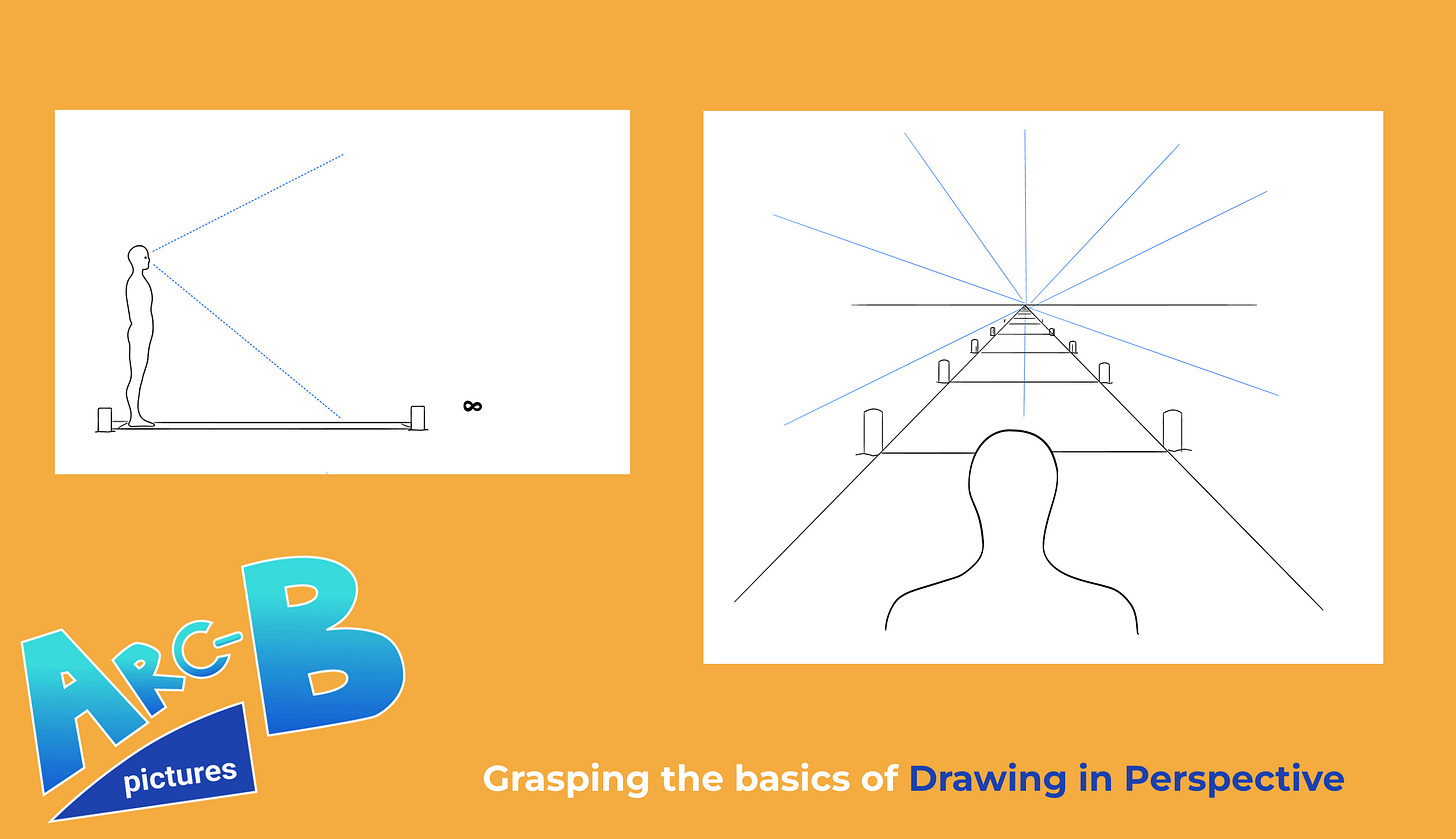
Point Perspective is a method for creating the illusion of depth on the flat surface of a 2D image by projecting radiating lines out from distant infinity. This mimics what we see with our eyes - we are always seeing things physically from a single point of view. Parallel lines provide the clearest illustration of this phenomenon and is how we normally show this most clearly in our artwrok. In drawing we refer to three main types of perspective: one-point, two-point, and three-point perspective.
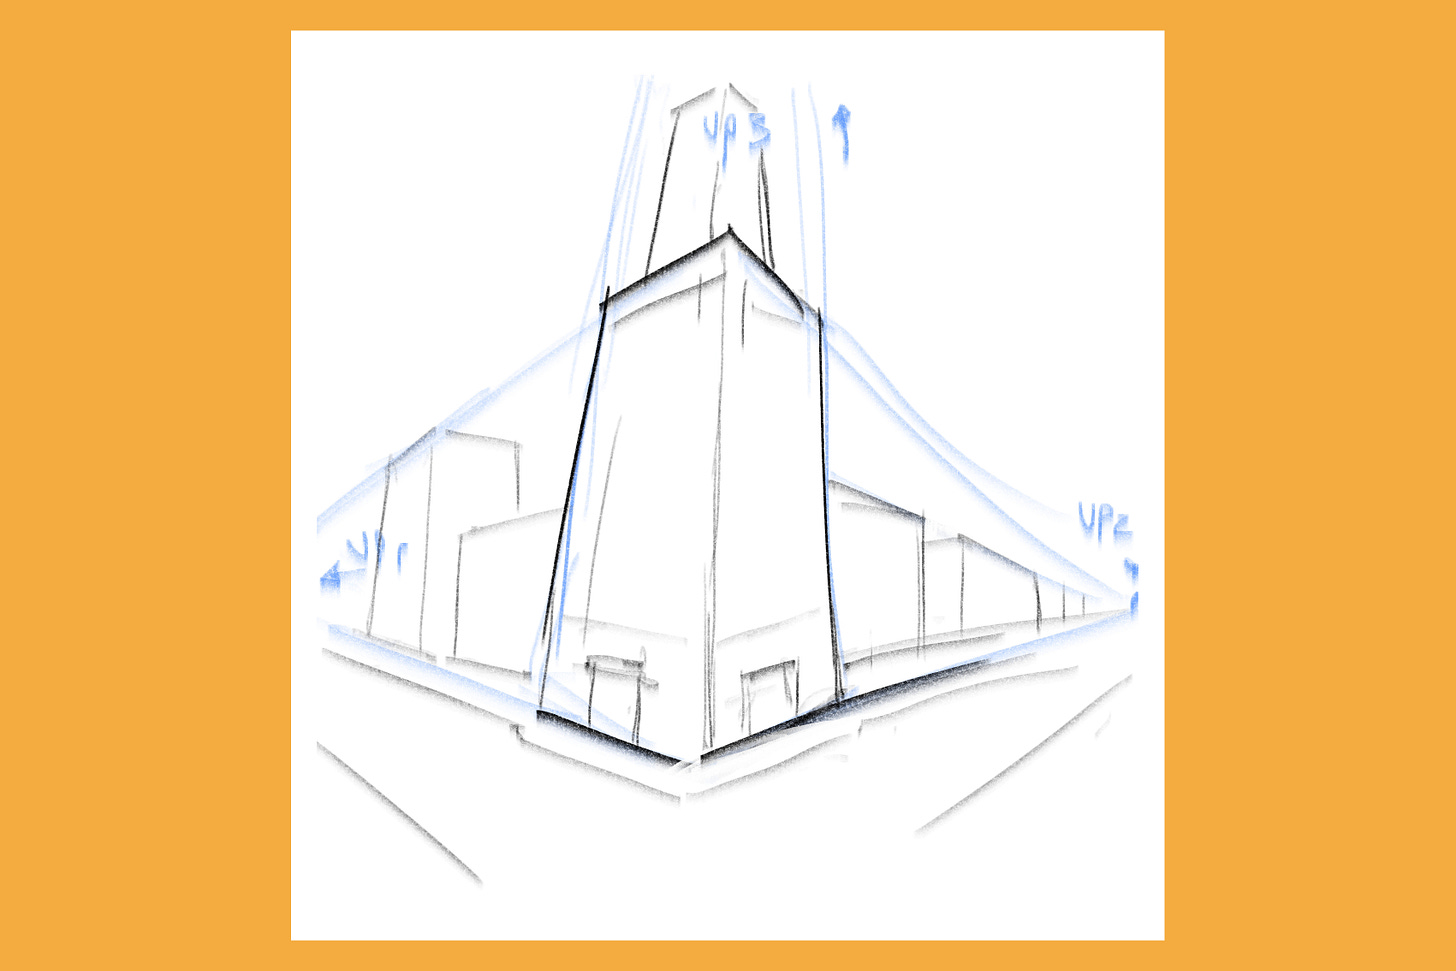
As we are in a 3-dimensional world, all three axes or directions are always there, the choice to employ, one-, two- or three-point perspective in our drawing is really about what the major planes (or object’s surfaces) in the artwork are doing and what will help us represent them. For example I’m sure the most common type of 1 point perspective image is of a road going away from the viewer to the horizon. When using all 3 points we must be arranged so that we are close enough to an object (or its big enough) that we see perspective recession occur in all three dimensions or directions – height, width and depth as in the below illustration.
2. Vanishing Points
Identify the vanishing points - where parallel lines appear to converge. In a one-point perspective drawing, there’s one main vanishing point on the horizon line. The two-point perspective has two vanishing points, and the three-point has, you guessed it, three. The placement of these vanishing points dictates the angle you have on your subject/object, I will often rough the basic drawing in first to see what I want, then put in VP’s after to double-check my work.
3. Horizon Line
The location of the horizon line in a drawing or image using point perspective is in direct relationship to the viewer's eye level. Everything above that line is being seen from below, and everything below it is seen from above. In point perspective vanishing points for horizontal planes will be on the horizon (this is not always visible, but you should be able to deduce it easily enough unless your subject is in outer space). Choosing where you put your horizon line on your page is a key decision in determining how the angles and framing of your scene will work out - consider if we should be looking down or up in the scene or do you want the horizon in the center for a perfectly level view?.
4. Use the Grid
Practice drawing perspective grids so that you can accurately place your scene into space. These perspective lines will help to keep the elements of your drawing in proportion and properly aligned. Some drawing software will have a grid tool to assist you - I often just draw what I need roughly as its quicker.
5. Practice with Simple Shapes
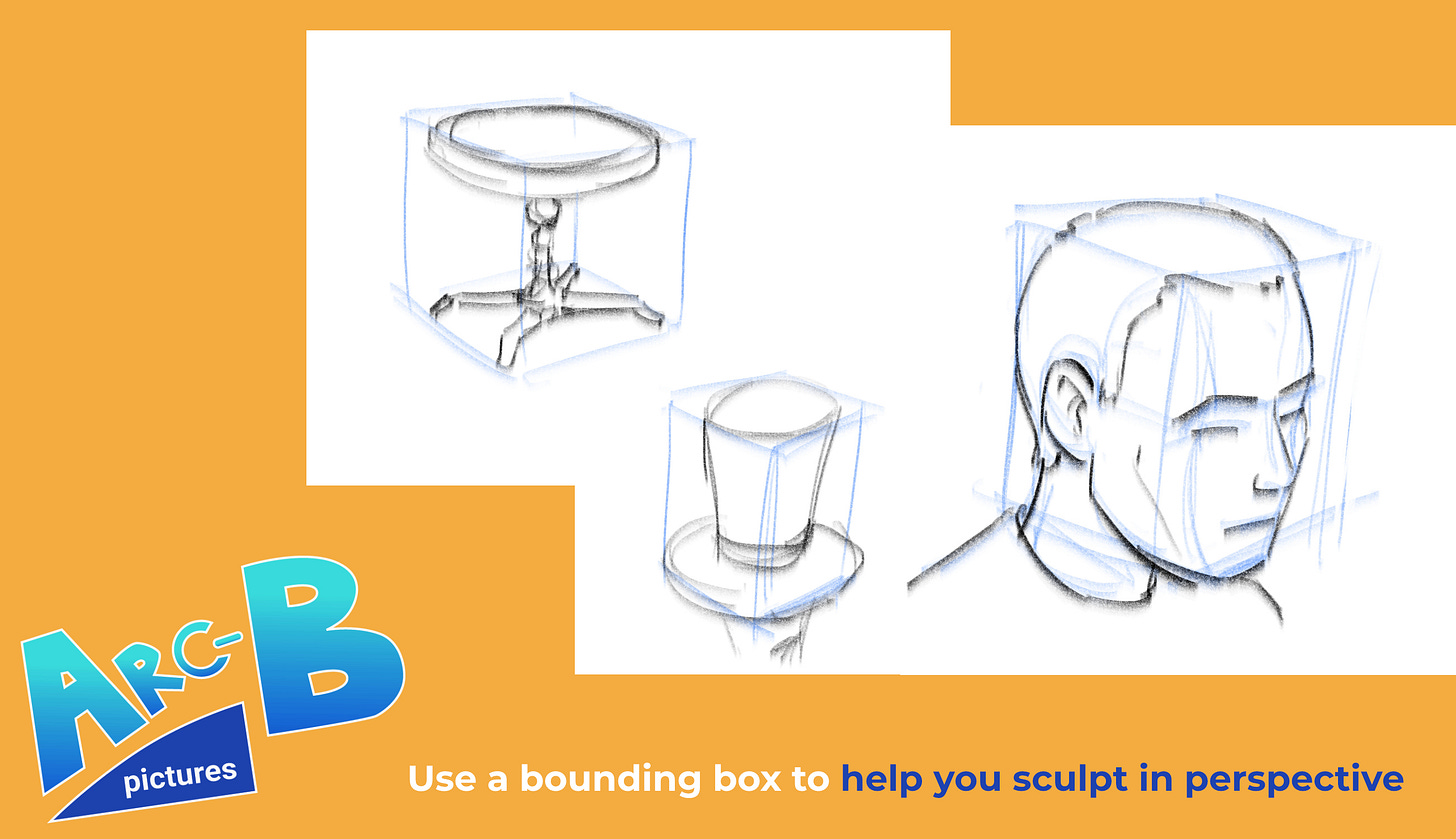
Draw boxes around everything using point perspective.
Before diving into your drawing details, begin with simple shapes – for ease of showing perspective the box or cube may be the simplest of all. Many buildings and objects are block shapes anyway and pretty much anything can be enclosed within a box as a way to show the perspective operating.
If you plan out your drawings with light marks that can establish your perspective first it will be easier to remedy any inconsistencies than if you jump right into details without doing that. Consider sketching a bounding box around more complex shapes as a way to start drawing interiors and other subjects, it can really help you to ‘sculpt’ the actual three-dimensional shape from that simple starting point, even if it’s not a cubic shape.
Common Problems
1. Ignoring/Mistaking Vanishing Points
Of course, you can just eyeball the vanishing point, but when starting out it is helpful to put them in where possible so that you are aware of them and get used to visualizing them. It can help a lot, if something looks off about the perspective to double-check your use of these, I have from time to time got some wall or other at a slightly off angle at first and checking the vanishing point helped me to correct it quickly.
2. Vanishing Points off the page
It will often happen that your Vanishing Points are off the surface of your drawing, especially with planes that are facing you at an oblique angle. In this case it’s usually easy enough to just draw projection lines to the edge and leave it at that.
3. Inconsistent Scale
Ensure that objects closer to the viewer are larger and those further away are smaller. You can work by eye but if there are point perspective cues that you can use to guide your choice of scale (such as by drawing a grid) it can be easier to achieve the consistency that is key to a realistic sense of depth. Later on we can look at some methods for doing this quite precisely.
Let’s Dive into Drawing
1. Drawing a Room in One-Point Perspective
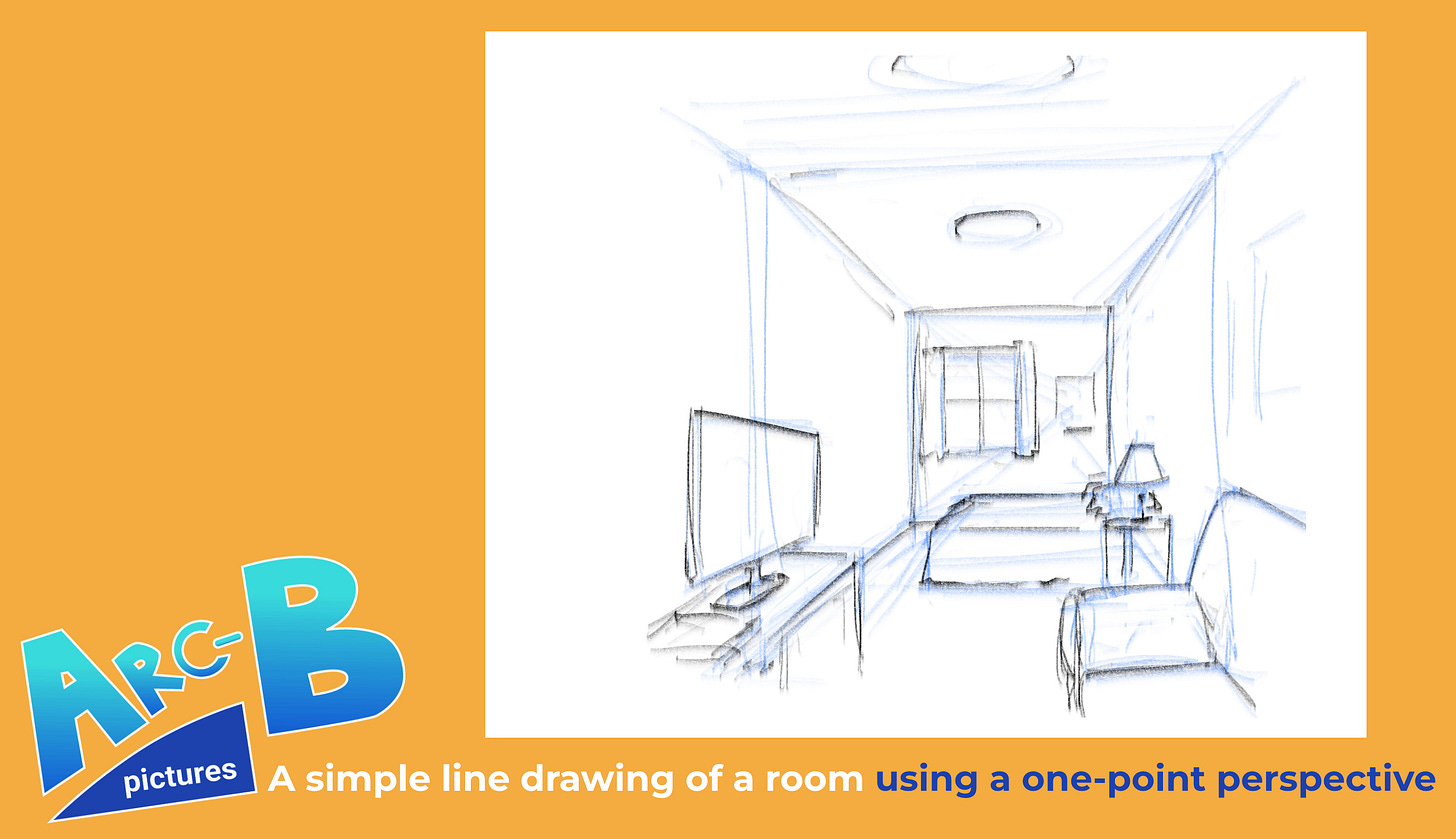
Practice doing a simple line drawing of a room using a one-point perspective. This will work best in a small or long room that is rectangular in plan. Start with the walls (position yourself so you can see three walls in your view), then add furniture and details, ensuring they all follow the same vanishing point. The walls to the left and right of you should be parallel and therefore share a vanishing point. To start, project a line from your vanishing point through to each wall’s top and bottom edges. This will determine your main perspective planes and anything sharing that alignment will have that same vanishing point. This should create a nice depth stage for the other elements of your room interior drawing.
Share your room drawing on Instagram and tag @arcb.pictures, we cannot wait to see your work
2. Brave the Two-Point Perspective
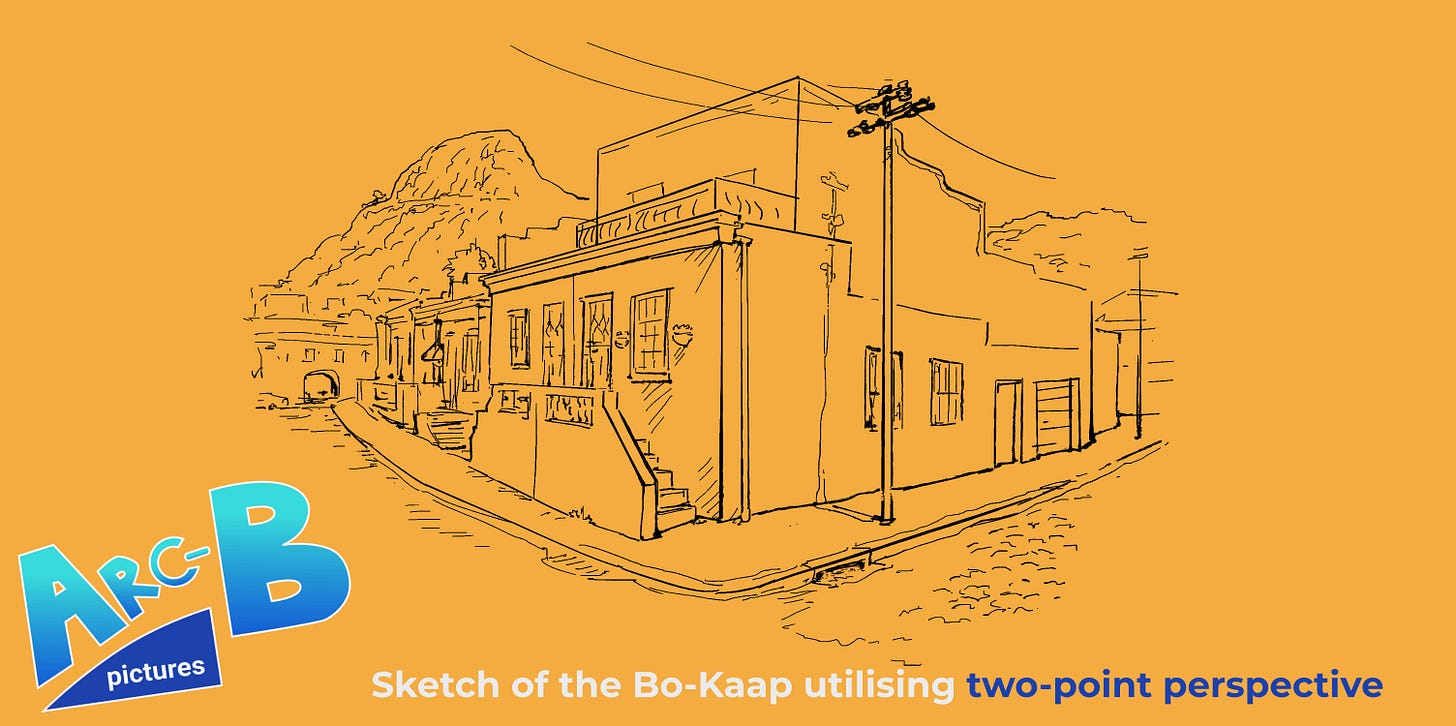
If you are feeling more confident, try drawing a two-point perspective cityscape. This usually works best if your main subject includes the corner of a building, city block or street that can show the two planes receding to their vanishing points. It can be as simple or as detailed as you like but make sure that you establish and use those two main vanishing points.
Visually Speaking
Here is a quick urban view from the Bo Kaap (making use of two vanishing points)
Happy Drawing! Remember, practice makes perfect. Share your progress with us using @arcb.pictures and stay tuned for news on courses, draw-along sessions, and awesome drawing content
If you are ready to learn more, sign up for our full 8-week mentorship with Archie Birch. Level up your drawing now. Seats are limited and the mentorship works on a first come first serve basis.


